How to Verify Mold Removal Is Complete: The Short Answer
Mold removal is complete when three things are true: the moisture source is fixed, all affected materials are dry, and a visual inspection finds no visible mold or musty odour. Testing is optional in most homes. It helps when you need proof for insurance, a sale, or a dispute.
At GTA Restoration, we have handled mold and water damage across the Greater Toronto Area for 19 years.
Below, we break down seven checks that tell you the job is actually done. We also cover when testing is worth it, how to read results, and what a clearance report should contain.
Key TakeawayVerification is not one test. It is a sequence: fix the water, dry the space, inspect visually, then test only if you need documented proof.
Start With a Mold Remediation Inspection Checklist
A mold remediation inspection checklist is a room-by-room list of what “done” looks like. It turns a vague feeling into something you can point at. Health Canada’s guidance on mould in indoor air is a good starting point for what to look for.
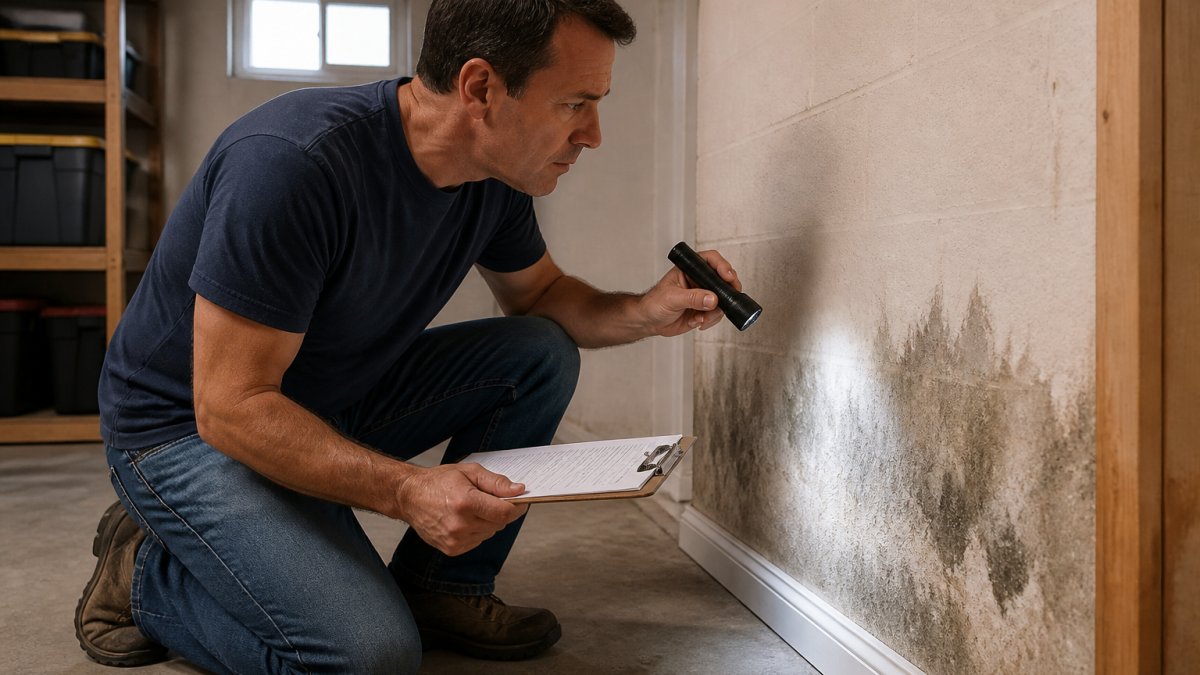
Walk the space with a flashlight and a notepad. Check the same spots twice: once at eye level, once low along baseboards and corners.
Room-by-Room Completion Checks
No visible mold growth on walls, ceilings, or floors
No musty or earthy odour in any room
Baseboards, drywall, and trim feel dry to the touch
No bubbling, peeling, or soft spots in painted surfaces
No staining or discoloration on ceilings below bathrooms
Cabinets and vanities show no dark spots inside
Carpet and padding are dry, with no lingering damp smell
Crawl spaces and basements show no new growth
Exhaust fans and vents are clean and running
No condensation on windows, pipes, or cold walls
A homeowner in casual clothes holding a clipboard and inspecting a basement wall with a flashlight, looking at a previously water-damaged area near the baseboard
If you check every box and still smell something, keep looking. Odour is often the first sign of a hidden moisture problem.
Watch OutPainting or sealing over mold without fixing the moisture source traps the problem behind the surface. It will return, usually within one heating season.
Confirm the Moisture Source Is Fixed and Materials Are Dry
Mold needs water. Remove the water and you remove the reason it grows. This is the step most people skip when they judge a cleanup by looks alone.
Start by finding where the water came from. Common sources include:
A slow leak under a sink or behind a fridge
A roof or window leak that only shows up in heavy rain
A blocked or broken downspout pushing water against the foundation
High indoor humidity with poor ventilation
A basement that floods after snowmelt or storms
Once the source is fixed, the space has to dry. Drying is not the same as “feels dry.” Water-damaged materials like drywall, wood framing, and subfloor hold moisture long after the surface feels normal.
How Dryness Is Actually Measured
Restoration work uses two instruments to confirm drying:
A pin-type or pinless moisture meter reads the percentage of moisture in a material. It is pressed against or into drywall, wood, or subfloor to get a number.
A thermo-hygrometer reads the temperature and relative humidity of the air in the room.
An infrared camera shows temperature differences that hint at trapped moisture behind a surface. It is a screening tool, not a measurement, so it should always be confirmed with a meter.
A common industry reference point is that structural wood is considered dry when its moisture content is in the range of 12% to 15%, and gypsum board is considered dry when readings are close to those of an unaffected “dry standard” area of the same home. Because every home has its own baseline, the comparison that matters most is affected material versus unaffected material of the same type, measured on the same day.
Set a Dry Standard Before You Start
Before any drying begins, a careful technician records readings from an unaffected part of the home, a wall in a dry room, a section of subfloor away from the loss. That becomes the dry standard. Every affected reading is then compared against it. A wall that reads 14% in a home whose dry standard is 9% is not dry, even if it feels fine to the touch.
Document the Readings, Not Just the Result
Ask for a moisture log. A useful one shows:
The date and time of each reading
The room and the specific material tested
The reading itself, in percent moisture content or relative humidity
The dry standard for comparison
The equipment used
Readings should trend downward over consecutive visits and stabilize near the dry standard. If a reading plateaus well above the dry standard, drying is not finished, no matter how the room looks.
Pro TipTake your own photos of the meter display next to the wall being tested. It is a simple way to keep an independent record if the numbers are ever questioned later.
Professionals use moisture readings and infrared scans to find wet spots behind walls. GTA Restoration uses the same tools, along with drying equipment for wet floors and walls. If readings stay high, drying is not finished, and testing or rebuilding on top of damp materials is a shortcut to a repeat problem.
Decide Whether Post-Remediation Mold Testing Is Necessary
Post-remediation mold testing is not required for every job. It is useful when you need documented proof that the space is clean. Skip it when the mold was small, the source is fixed, and a visual inspection comes back clear.
The mold covered a large area or came back after a previous cleanup
You and a contractor disagree about whether the job is done
For a small patch on a bathroom ceiling with a fixed leak, a careful visual inspection is often enough. For anything larger, or anything you need to prove, testing gives you a record you can hand to someone else.
Test results compare the air or surfaces inside your home to a baseline. That baseline is usually an outdoor comparison sample taken the same day.
A qualified laboratory analyzes the samples and reports spore levels and mold species. Here is how to read the report:
What You See
What It Usually Means
Indoor spore levels similar to outdoors
Normal, cleanup looks complete
Indoor levels higher than outdoors
Possible hidden growth or incomplete removal
Same species indoors and outdoors
Likely normal background
A species indoors that is absent outdoors
Worth investigating further
Elevated levels in one room only
That room needs another look
No single number means “safe” or “unsafe.” The comparison between indoors and outdoors matters more than any single reading. Ask the lab or your contractor to walk you through the numbers rather than reading the raw count alone.
Pro TipTake the outdoor comparison sample at the same time as the indoor samples, on the same day. A sample taken hours apart or in different weather tells you much less.
How Long to Wait for Mold Testing After Remediation
Wait until the space is fully dry before testing. Testing a damp room can show elevated spore levels that have nothing to do with leftover mold.
In practice, that means:
Confirm the moisture source is fixed
Confirm drying equipment has been removed and readings are normal
Wait for any cleaning dust to settle
Then take samples
If a contractor tests the same day they finish wiping surfaces, the results can be misleading. Dust stirred up during cleanup can land in a sample and look like a problem. Give the room time to settle, and let the drying readings guide the timing.
What a Mold Remediation Clearance Report Should Include
A mold remediation clearance report is the written record that the job is done. Ask for it before you make the final payment. A useful report includes:
The date of the inspection and who performed it
The rooms and materials that were checked
Moisture readings and where they were taken
Whether the moisture source was fixed, and how
Photos of the affected areas before and after
Lab results, if testing was done
A clear statement of whether the space passed
If a contractor cannot produce this, treat it as a warning sign. A verbal “it’s all good” is not a record.
One more thing worth knowing: if the same company that did the cleanup also does the testing, there is a built-in conflict of interest. An independent third party doing the clearance test removes that doubt.
Common Mistakes That Make Mold Removal Verification Fail
Most failed verifications come down to a short list of avoidable errors. Watch for these:
Judging by sight alone. Hidden mold behind walls and under floors does not show up in a walkthrough.
Skipping the moisture check. A dry-looking wall can still hold water inside the framing.
Testing too early. Sampling before the space is dry gives you numbers you cannot trust.
Letting the cleanup crew grade its own work. Independent verification avoids the conflict.
Ignoring the odour. A musty smell after cleanup usually means something was missed.
Fixing the mold but not the leak. Without source control, mold will grow back.
If mold returns after a cleanup, do not just clean it again. Find out why. Recurring mold almost always points to an unfixed moisture intrusion or a space that never fully dried.
Conclusion: When to Call a Professional to Verify Mold Removal
Verifying mold removal is mostly about process, not guesswork. Fix the water, dry the space, inspect carefully, and test only when you need proof. Do those in order and you will know where you stand.
If you are unsure, or if the job was large, a professional assessment removes the doubt. GTA Restoration provides mold removal, remediation, testing, and inspections across the Greater Toronto Area. Our team treats visible mould and traces its moisture source, using infrared scans and moisture readings to find hidden leaks. We also help you document everything for your property insurance claim.
Call 416-800-0000 for 24/7 help and a clear answer on whether your space is actually clean.
Frequently Asked Questions
How do you know if mold remediation was successful?
Successful mold removal means three things line up: no visible mold or musty odor remains, moisture readings show the structure and materials are dry, and any post-remediation testing or clearance inspection confirms normal conditions. A written clearance report from the remediation contractor should document all three. If the moisture source was never fixed, mold will return regardless of how clean the surfaces look on the day of the final walkthrough.
Should you get a mold test after remediation?
Testing is most useful when you need documentation for an insurance claim, a real estate transaction, or a dispute about whether the work was done properly. If the affected area was small, the moisture source is fixed, and a thorough visual inspection shows no visible mold or odor, testing may not be necessary. When you do test, use a qualified laboratory and compare indoor samples against an outdoor comparison sample.
How long should you wait to test for mold after remediation?
Wait until the remediated area is fully dry and any containment has been removed. Testing too soon, while surfaces are still damp or dust is settling, can produce misleading spore levels. Ask your remediation contractor to confirm drying is complete before scheduling post-remediation mold testing. If mold returns after a passed clearance test, that usually points to an unresolved moisture intrusion problem rather than a testing timing issue.
What should a mold remediation clearance report include?
A clearance report should describe the scope of work, the moisture source that was corrected, the materials removed, and the drying or verification steps taken. It should also include moisture readings, visual inspection findings, any sampling results with laboratory analysis, and a clear statement that the area passed clearance. Keep this document for your insurance claim and for any future sale of the property.
Property damage can affect a home, business or shared building. GTA Restoration serves communities across Canada, including Toronto and the GTA. We are opening locations in the United States. Contact us to confirm current services and availability for your address. We help assess the problem and plan the next steps. Tell us what happened, when it started and which areas are affected so we can discuss access and the scope of work.
Emergency Restoration Help
Call for 24/7 restoration help. Describe any active leak, standing water or visible damage. Access, site conditions and crew availability affect the response.
Water Removal
Standing water needs a plan suited to its source and the affected materials. Share details about the depth, location and any known contamination.
Moisture Checks
Visible marks may not show the full extent of a leak. Moisture readings help identify areas that need closer inspection and follow-up.
Drying Plans
Drying equipment must suit the room and materials. Progress checks help the team review the setup before repairs cover affected surfaces.
Mold Concerns
Report visible mold, musty smells and past leaks. Addressing the moisture source is an important part of planning cleanup and repairs.
Fire and Smoke Damage
Smoke, soot and firefighting water can affect different parts of a building. Discuss the affected areas before moving belongings or starting cleanup.
Contaminated Areas
Sewage and other contamination need a site-specific approach. Keep people and pets away from affected areas while arranging an assessment.
Commercial Properties
Building access, tenants and operating hours matter. Our commercial restoration services help owners and managers plan work around site needs.
Equipment Rental
Explore restoration equipment rental and confirm the unit, power requirements, rental dates and operating instructions before booking.
Documentation and Repairs
Keep photos, dates and relevant receipts. Discuss the repair scope with the team; your insurer determines coverage under your policy.
Need help with property damage? Call GTA Restoration at 416-800-0000 to discuss your property and the next steps.
GTA Restoration serves communities across Canada, including Toronto and the GTA. U.S. locations are opening. Browse our Canadian service areas below, and contact us to confirm services and availability for your address.
GTA Restoration serves communities across Canada, including Toronto and the GTA. U.S. locations are opening. Tell us the property address so we can discuss the work needed and confirm current availability.
What should I tell the team first?
Describe what happened, when you noticed it and which rooms are affected. Mention any active leak or access restrictions. These details help us discuss the next step and confirm availability.
How is the drying plan decided?
The water source, affected materials and moisture readings help guide the plan. Equipment needs can change as work progresses. Ask how the team will check conditions before repairs cover the affected area.
Can restoration work be covered by insurance?
Coverage depends on your policy and the cause of the damage. Your insurer decides the claim. Keep photos, dates and receipts, and ask which records are needed before agreeing to the work.
Who can I call about urgent damage?
Call the phone number shown on this page for 24/7 restoration help. Explain the problem and ask about availability. If there is immediate danger, contact emergency services and follow their directions.
Direct Billing & Insurance Claims
Ask your insurer about coverage, deductibles and the records it needs.
In-House Financing Available
Financing up to 24 months. No interest. No money down. Ask us about the terms.




 Facebook
  Instagram
  LinkedIn
  X / Twitter
  YouTube