How to Get Mold Out of Your Bathroom
How to Remove Mold from Your Bathroom
Got mold in your bathroom? Don’t worry; we’ve got you covered. This guide will show you how get mold out step-by-step. Whether it’s on tiles, walls, or ceilings, we’ll provide practical and easy methods to remove mold. Follow along to keep your bathroom clean and prevent future mold growth.
Key Takeaways
-
Identifying mold through visual signs and musty odors is essential for early detection and prevention in bathrooms.
-
Appropriate tools and cleaning solutions, such as vinegar and borax, are vital for effective mold removal from hard surfaces and caulk.
-
Implementing preventive measures, such as improving ventilation, maintaining a cleaning routine, and controlling moisture levels, is key to reducing the likelihood of mold growth in bathrooms.
Identifying Mold in Your Bathroom
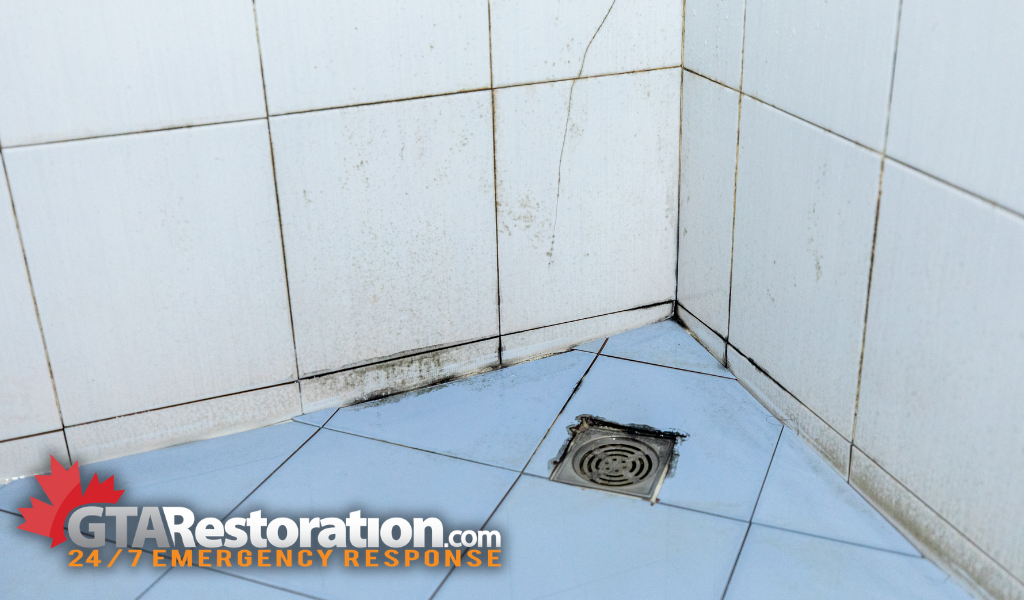
Detecting mold in your bathroom is crucial for maintaining a clean, healthy space. Mold growth is primarily caused by excessive moisture and lack of ventilation. Common signs of mold include visible black splotches in damp areas, discoloration in tile grout, and peeling wallpaper, which may indicate hidden mold behind surfaces.
Here are the specific indicators of mold presence.
Visual Signs of Mold
Visual signs often provide the first clues of a mold problem in your bathroom. Discoloration on walls, ceilings, or floors is a common sign of mold growth. Black mold, which typically appears fuzzy and slimy with dark coloration, is notorious for its unsightly appearance and potential health risks.
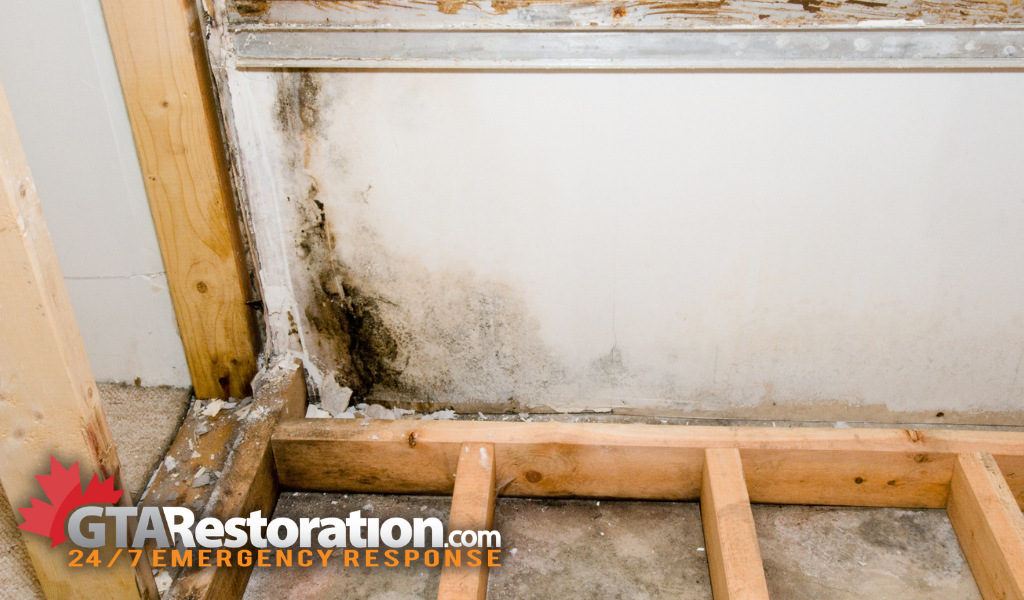
Mold on drywall or subfloor can also suggest hidden mold in the bathroom.
Musty Odors
A musty odor is a key sign of hidden mold in bathrooms. This smell, reminiscent of wet soil or decay, is often more noticeable in damp environments with poor ventilation.
A persistent musty odor likely indicates hidden mold, even if it’s not immediately visible.
Tools and Materials Needed for Mold Removal
The right tools and materials are crucial for effective mold removal. Appropriate tools make the job easier and ensure mold spores are effectively eradicated, preventing future growth.
Here are the basic cleaning supplies and solutions to tackle bathroom mold.
Basic Cleaning Supplies
Essential tools for mold removal include a spray bottle, scrub brush, microfiber cloth, rubber gloves, and protective eyewear. A spray bottle is used to apply cleaning solutions, while a scrub brush helps in scrubbing affected areas to get rid of mold.
A microfiber cloth is useful for wiping down surfaces, rubber gloves protect your hands, and protective eyewear shields your eyes during cleaning.
Cleaning Solutions
Bleach, vinegar, and borax solutions are commonly used to remove mold. Bleach is most effective on non-porous surfaces but should be used cautiously due to its corrosive nature. Vinegar’s antifungal properties make it a useful agent for mold removal on non-porous surfaces. Hydrogen peroxide is also an effective solution for this purpose.
A borax solution can also be effective, particularly on grout lines.
Step-by-Step Guide to Removing Mold from Hard Surfaces
A systematic approach is necessary for removing mold from hard surfaces in the bathroom. This guide explains using vinegar and borax solutions effectively to clean mold from bathroom tiles and other hard surfaces.
Using Vinegar Solution
Vinegar naturally and effectively kills mold. Fill a spray bottle with undiluted white vinegar and spray it directly onto the moldy areas. Let the vinegar sit for about an hour to ensure it penetrates the mold spores. Afterward, scrub the area with a bristle brush to remove the mold, and clean the surface with a microfiber cloth.
For stubborn mold, let the vinegar sit overnight. After removing the mold, dry the area thoroughly to prevent future growth. Vinegar is safe to leave on surfaces overnight, making it a convenient option for ongoing mold prevention.
Applying Borax Solution
Borax also effectively removes mold. Create a borax solution by mixing one cup of borax with one gallon of warm water. Spray the solution directly onto the moldy surfaces. Use an old toothbrush or small bristle brush to scrub the affected area, ensuring you reach all the mold.
After scrubbing, use the remaining borax solution to mop the floor, especially if it’s tile or vinyl. This cleans any residual mold spores and prevents new mold growth. Dry the area completely to ensure no moisture is left behind, which could lead to mold returning.
Removing Mold from Bathroom Walls
Different techniques are needed to clean mold from painted or wallpapered bathroom walls.
Choosing the right cleaning solution prevents surface damage while effectively removing mold.
Painted Walls
Spray the cleaning solution onto painted walls and gently scrub the area with a soft bristle brush. After scrubbing, wipe the area clean with a microfiber cloth to remove any residue.
Allow the area to dry overnight to ensure all moisture is gone, preventing mold from returning.
Wallpapered Walls
Cleaning mold from wallpapered walls requires a delicate touch to avoid damage. Carefully apply a vinegar solution to the affected area, avoiding oversaturation. Gently scrub with a soft cloth or sponge to remove the mold.
Thoroughly dry the wallpaper after cleaning to prevent mold from returning.
How to Eliminate Mold from Bathroom Ceilings
Careful preparation and techniques are essential for removing mold from bathroom ceilings. Warm, humid environments from inadequate ventilation or leaks facilitate mold growth on ceilings.
Effective mold removal requires safety precautions and a thorough cleaning process.
Preparation and Safety
Prepare and protect yourself before tackling mold on your bathroom ceiling. Wear rubber gloves, goggles, and a mask to prevent mold spore exposure. Cover surrounding areas with plastic sheeting to contain spores during cleaning.
Prioritize safety!
Cleaning Process
Clean mold from the bathroom ceiling by applying a bleach solution (one bleach to three parts water) and spraying it onto moldy areas. Allow the solution to rest for 10 to 15 minutes, allowing it to penetrate the mold effectively. Thoroughly clean the affected areas with a scrub brush afterward.
After scrubbing the mold, wipe the area with clean cloths or paper towels to remove residue. Using fans or dehumidifiers, ensure the ceiling dries completely. This prevents mold from returning due to lingering moisture.
Preventing Mold Growth in Bathrooms
Preventing mold growth in bathrooms is vital for maintaining a clean, healthy space. Mold thrives in damp environments, so reducing moisture and improving ventilation is essential.
Here are some effective strategies to keep bathroom mold at bay.
Improve Ventilation
Improving bathroom ventilation is vital for preventing mold growth. An exhaust fan can significantly reduce humidity levels and improve air circulation. Opening windows during and after showers also helps to expel moisture and reduce the risk of mold.
Determine the necessary capacity by multiplying the bathroom square footage by 1.1 to ensure your bathroom fan is appropriately sized.
Regular Cleaning Routine
A regular cleaning routine is vital for keeping mold at bay. Disinfect bathroom surfaces weekly to prevent mold accumulation.
Regularly clean and dry the shower stall. Ensure towels and bath rugs are cared for to reduce moisture that can promote mold spores.
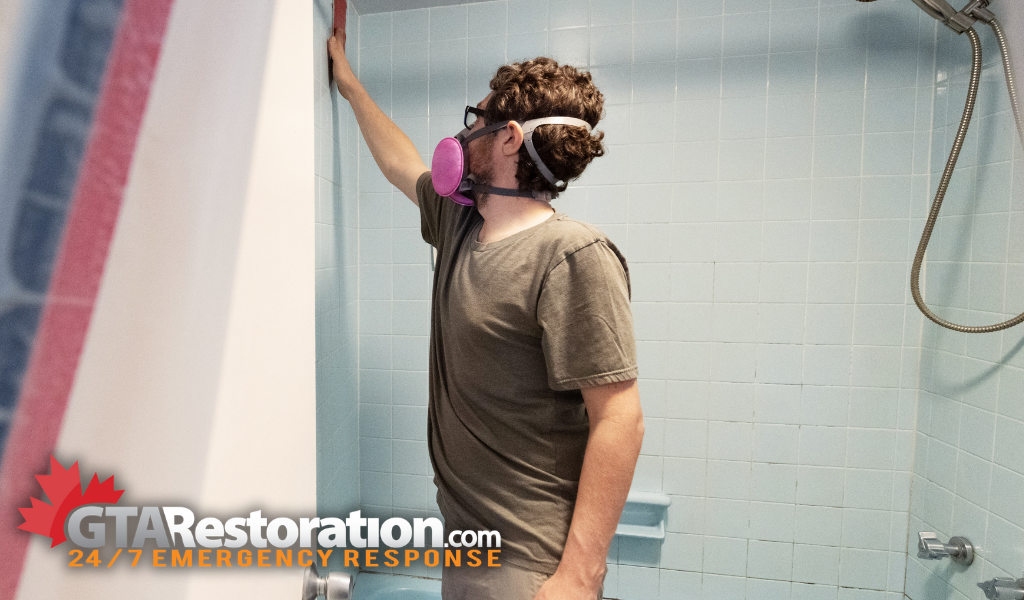
Control Moisture Levels
Controlling moisture levels in the bathroom is crucial for preventing mold growth. Promptly address any leaks in plumbing, such as faucets, valves, and pipes. Use dehumidifiers to lower humidity levels and squeegee shower walls daily to reduce water buildup.
Promptly removing damp towels is also crucial to keep mold at bay.
Treating Mold in Shower Caulk
Mold in shower caulk can be stubborn, but the right approach ensures effective treatment. This section covers cleaning existing mold and replacing moldy caulk for a thorough solution.
Cleaning Existing Mold
Clean moldy shower caulk using a vinegar solution or diluted bleach. Mix equal vinegar and water, spray on moldy caulk, and let it sit for 1-2 hours before scrubbing and rinsing.
Use a diluted bleach solution (one part bleach to four parts water) for severe cases. Ensure the area is well-ventilated to prevent future mold issues.
Replacing Moldy Caulk
If the mold problem persists, replace the shower caulk. Use silicone caulk, which is more mold-resistant than other types.
Thoroughly remove old, damaged caulk before applying new mildew-resistant caulk to ensure a proper seal and prevent future mold growth.
Safe Practices for Mold Removal
Safety is paramount during mold removal. Safe practices protect your health and ensure effective mold removal.
This section discusses the importance of protective gear and disposal of contaminated materials properly.
Protective Gear
Wearing protective gear is crucial for safeguarding your health when handling mold. Wear rubber gloves and protective eyewear to prevent skin and eye irritation. Use a mask, such as a NIOSH-approved N95 respirator, to avoid inhaling mold spores during cleaning.
Seal off affected areas to prevent mold spores from spreading to other parts of your home.
Proper Disposal
Proper disposal of contaminated materials is crucial for preventing the spread of mold spores. To safeguard your health, wear gloves, masks, and protective eyewear when handling moldy materials. Seal contaminated items in plastic bags before disposal to prevent the spread of spores.
This ensures mold does not return to your living space.
Summary
In summary, removing and preventing bathroom mold involves identifying early signs, using the right tools and cleaning solutions, and maintaining regular cleaning routines. Addressing the underlying causes, such as poor ventilation and excess moisture, is crucial to keeping your bathroom mold-free. Following these tips and best practices can effectively kill mold and enjoy a cleaner, healthier bathroom environment.
Frequently Asked Questions
What are the common signs of mold in a bathroom?
Common signs of mold in a bathroom include visible black splotches, discoloration in tile grout, peeling wallpaper, and a persistent musty odor. Identifying these signs promptly can help prevent further moisture-related issues.
What cleaning solutions are best for removing mold from bathroom surfaces?
The most effective cleaning solutions for removing mold from bathroom surfaces are bleach for non-porous surfaces, and vinegar or borax for a broader range of surfaces. Choosing the right solution ensures effective mold removal and maintains the integrity of your bathroom surfaces.
How can I prevent mold from growing in my bathroom?
To prevent mold growth in your bathroom, enhance ventilation with an exhaust fan, establish a consistent cleaning schedule, and manage moisture by repairing leaks and utilizing dehumidifiers. Taking these steps will help maintain a mold-free environment.
What protective gear should I wear when cleaning mold?
To ensure adequate protection against exposure, it is essential to wear rubber gloves, protective eyewear, and a NIOSH-approved N95 respirator when cleaning mold. Taking these precautions will help safeguard your health during the cleanup process.
What should I do if mold keeps returning to my shower caulk?
If mold keeps returning to your shower caulk, replace it with mildew-resistant silicone caulk and improve ventilation to prevent future growth. Addressing these factors will help maintain a cleaner and healthier bathroom environment.
How to Remove Mold Emergency?
Call Today!
1-800-506-6048
For non-emergencies use our contact form
Natural Mold Removal Alternatives for a Green Home
When it comes to mold removal, many store-bought solutions contain harsh chemicals that can be damaging to both the environment and your health. Fortunately, there are natural alternatives that can be just as effective without the toxic side effects.
One of the most popular natural mold removers is vinegar. Its acetic acid content makes it a powerful tool for killing mold spores on hard surfaces like tiles and grout. Simply spray undiluted white vinegar directly onto the affected area, let it sit for an hour, and then scrub with a brush.
Baking soda is another excellent mold fighter. Not only does it absorb moisture, but it also helps to scrub away mold without releasing harmful fumes. Mix a tablespoon of baking soda with water to form a paste, then apply it to the moldy surface. After scrubbing, rinse the area and repeat the process as necessary.
Hydrogen peroxide is a slightly stronger natural option that works well on porous surfaces like wood and fabric. With its antifungal and antibacterial properties, hydrogen peroxide can effectively kill mold spores. Spray it on the affected area and let it sit for at least 10 minutes before scrubbing.
For a more pleasant-smelling alternative, tea tree oil works wonders as a natural fungicide. Mix a teaspoon of tea tree oil with a cup of water and spray it directly on mold-infested areas. The strong scent might linger for a short time, but it’s a safer and more eco-friendly option compared to bleach.
Lastly, essential oils such as lavender or eucalyptus oil can serve as both a natural disinfectant and deodorizer. These oils can be diluted with water and used to treat mold and prevent regrowth. Regular use of these alternatives can help maintain a mold-free environment without compromising your health or the planet.
How to Check for Hidden Mold Behind Bathroom Fixtures
Mold often hides in areas that aren’t immediately visible, making it tricky to detect. Bathrooms, with their high humidity levels, are prime spots for mold growth behind fixtures like sinks, toilets, and bathtubs. To check for hidden mold, start by inspecting the grout and caulking around bathroom fixtures.
Discoloration or dark spots in these areas can be a sign that moisture has penetrated beneath the surface, potentially fostering mold growth. Next, remove any accessible panels or covers that may conceal plumbing pipes. Mold thrives in damp, hidden spaces, so if there is a musty odor emanating from behind the fixture, it’s an indication that mold may be present.
Carefully feel for moisture on the walls or ceilings behind the fixture, especially in areas near plumbing pipes, as leaking pipes can create the ideal conditions for mold to grow.
If you’re able to remove the fixture, carefully inspect the wall surface behind it. Use a flashlight to examine hard-to-see corners, as these are often the spots where mold colonies begin to form. Pay close attention to any visible water damage, such as stains or peeling paint, as this could indicate mold growth.
In some cases, mold might be invisible to the naked eye but detectable through moisture readings. A moisture meter can be used to check behind fixtures or walls for excessive dampness that could lead to mold. If you suspect mold growth but can’t confirm it, it might be worth consulting a professional who can perform more thorough inspections and mold tests.
Service Areas Across Canada
GTA Restoration serves communities across Canada, including Toronto and the GTA. U.S. locations are opening. Browse our Canadian service areas below, and contact us to confirm services and availability for your address.
Search
- Air Duct Cleaning Montreal
- Ajax Asbestos Removal
- Ajax Mold Removal
- Ajax Water Damage
- Asbestos Removal Calgary
- Asbestos Removal Edmonton
- Asbestos Removal Fort Saskatchewan
- Asbestos Removal Gloucester
- Asbestos Removal Grimsby
- Asbestos Removal Hamilton
- Asbestos Removal Kanata
- Asbestos Removal Kitchener
- Asbestos Removal Laval
- Asbestos Removal Lincoln
- Asbestos Removal Montreal
- Asbestos Removal Nepean
- Asbestos Removal Niagara Falls
- Asbestos Removal Orleans
- Asbestos Removal Ottawa
- Asbestos Removal Sherwood Park
- Asbestos Removal Spruce Grove
- Asbestos Removal St Catharines
- Asbestos Removal St-Albert
- Asbestos Removal Thorold
- Asbestos Testing Hamilton
- Asbestos Testing Montreal
- Asbestos Testing Petersburg
- Aurora Mold Removal
- Aurora Water Damage
- Beaconsfield Asbestos Removal
- Brampton Asbestos Removal
- Brampton Mold Removal
- Brampton Water Damage
- Burlington Asbestos Removal
- Burlington Mold Removal
- Burlington Water Damage
- Burst Pipe Montreal Frozen Pipe
- Burst Pipe Repair Edmonton
- Burst Pipe Repair Ottawa
- Caledon Mold Removal
- Caledon Water Damage
- Calgary Mold Removal
- Calgary Water Damage
- Cambridge Mold Removal
- Cambridge Water Damage
- Clarington Mold Removal
- Concord Mold Removal
- Concord Water Damage
- Cooksville Mold Removal
- Edmonton Water Damage
- Emergency Roofing Vancouver
- Etobicoke Asbestos Removal
- Etobicoke Mold Removal
- Etobicoke Water Damage
- Fire Damage Grimsby
- Fire Damage Lincoln
- Fire Damage Niagara Falls
- Fire Restoration Fort McMurray
- Fire Damage Restoration Thorold
- Fire Damage St Catharines
- Flood Cleanup Grimsby
- Flood Cleanup Lincoln
- Flood Cleanup Niagara Falls
- Flood Cleanup St Catharines
- Flood Cleanup Thorold
- London Mold Removal
- London Water Damage
- Markham Asbestos Removal
- Markham Mold Removal
- Markham Water Damage
- Mississauga Asbestos Testing
- Mississauga Mold Removal
- Mississauga Water Damage
- Mold Inspection Removal Kitchener
- Mold Remediation Montreal
- Mold Removal & Inspection LaSalle
- Mold Removal Anjou
- Mold Removal Boucherville
- Mold Removal Brossard
- Mold Removal Burnaby
- Mold Removal Chambly
- Mold Removal Chateauguay
- Mold Removal Chomedey
- Mold Removal Coquitlam
- Mold Removal Dollard Des Ormeaux
- Mold Removal Dorval
- Mold Removal Edmonton
- Mold Removal Fort Saskatchewan
- Mold Removal Gloucester
- Mold Removal Grimsby
- Mold Removal Hamilton Inspection
- Mold Removal Ile Bizard
- Mold Removal in Osgoode
- Mold Removal Beaconsfield
- Mold Removal Kahnawake
- Mold Removal Kanata
- Mold Removal Kirkland
- Mold Removal Laval
- Mold Removal Lincoln
- Mold Removal Longueuil
- Mold Removal Montreal East
- Mold Removal Mount Royal
- Mold Removal Nepean
- Mold Removal New Westminster
- Mold Removal Niagara Falls
- Mold Removal Orleans
- Mold Removal Ottawa
- Mold Removal Cumberland
- Mold Remediation Hampstead
- Mold Removal Remediation Roxboro
- Mold Removal Richmond BC
- Mold Removal Rideau Lakes
- Mold Removal Rockcliffe Park
- Mold Removal Saint Hubert
- Mold Removal Saint Laurent
- Mold Removal Sherwood Park
- Mold Removal Spruce Grove
- Mold Removal St Catharines
- Mold Removal Ste Dorothee
- Mold Removal St۔ Albert
- Mold Removal Surrey
- Mold Removal Thorold
- Mold Removal Vancouver
- Mold Removal Vanier
- Mold Removal Westmount
- Montreal Biohazard Cleanup
- Montreal Emergency Plumber
- Montreal Fire Restoration
- Montreal Flood Cleanup
- Montreal Odor Removal
- Montreal Roofing Emergency
- Montreal Sewer Backup Cleanup
- Montreal Water Leak Detection
- Montréal Asbestos Removal
- Montréal Emergency Plumbing
- Montréal Mold Removal
- Montréal Pipe Burst Emergency
- Montréal Water Damage
- Newmarket Mold Removal
- Newmarket Water Damage
- North York Mold Removal
- Oakville Mold Removal
- Oakville Water Damage
- Oshawa Mold Removal
- Oshawa Water Damage
- Ottawa Air Duct Cleaning
- Pickering Mold Removal
- Pickering Water Damage
- Red Deer Water Damage
- RedDeer Mold Removal
- Richmond Hill Mold Removal
- Richmond Hill Water Damage
- Roof Repair Lincoln
- Roof Repair Niagara Falls
- Roof Repair St Catharines
- Scarborough Asbestos Removal
- Scarborough Mold Removal
- Scarborough Water Damage
- Sewage Cleanup Edmonton
- Sewer Backup Lincoln
- Sewer Backup Niagara Falls
- Sewer Backup Ottawa
- Sewer Backup St Catharines
- Thornhill Mold Removal
- Toronto & GTA Asbestos Removal
- Toronto & GTA Mold Removal
- Toronto Air Duct Cleaning
- Toronto Water Damage
- Unionville Mold Removal
- Unionville Water Damage
- Vancouver Asbestos Removal
- Vancouver Biohazard Cleanup
- Vancouver Emergency Plumber
- Vancouver Emergency Plumbing
- Vancouver Fire Restoration
- Vancouver Flood Cleanup
- Vancouver Mold Removal
- Vancouver Odor Removal
- Vancouver Pipe Burst Emergency
- Vancouver Sewer Backup Cleanup
- Vancouver Water Damage
- Vancouver Water Leak Detection
- Vaughan Mold Removal
- Vaughan Water Damage
- Vermiculite Removal Ottawa
- Water Damage Grimsby
- Water Damage Kanata
- Water Damage Kitchener
- Water Damage Lincoln
- Water Damage Longueuil
- Water Damage Nepean
- Water Damage Niagara Falls
- Water Damage Orleans
- Water Damage Ottawa
- Water Damage Repair Montreal
- Water Damage Laval Montreal
- Water Damage Restoration Thorold
- Sewage Backup Cleanup Montreal
- Water Damage St Catharines
- Water Damage Vancouver
- Water Flood Damage Repair Hamilton
- Flood Damage Repair Hampstead
- Whitby Water Damage
- Woodbridge Asbestos Removal
- Woodbridge Mold Removal
- Woodbridge Water Damage
- Restoration Equipment Rental
Restoration Questions
Where are your services available?
GTA Restoration serves communities across Canada, including Toronto and the GTA. U.S. locations are opening. Tell us the property address so we can discuss the work needed and confirm current availability.
What should I tell the team first?
Describe what happened, when you noticed it and which rooms are affected. Mention any active leak or access restrictions. These details help us discuss the next step and confirm availability.
How is the drying plan decided?
The water source, affected materials and moisture readings help guide the plan. Equipment needs can change as work progresses. Ask how the team will check conditions before repairs cover the affected area.
Can restoration work be covered by insurance?
Coverage depends on your policy and the cause of the damage. Your insurer decides the claim. Keep photos, dates and receipts, and ask which records are needed before agreeing to the work.
Who can I call about urgent damage?
Call the phone number shown on this page for 24/7 restoration help. Explain the problem and ask about availability. If there is immediate danger, contact emergency services and follow their directions.
Learn more ↴ 
Latest Articles
Direct Billing & Insurance Claims
Ask your insurer about coverage, deductibles and the records it needs.

In-House Financing Available
Financing up to 24 months. No interest. No money down. Ask us about the terms.
Certifications & Insurance
View our firm certification, technician qualifications and insurance documents.

IICRC Certified Firm
GTA Restoration Inc.
Firm number 199912
Valid through
Business Insurance
GTA Restoration Group Inc.
$5 million general liability per occurrence
$8 million contractors pollution per claim
–
IICRC Technician Qualifications
Richard Mark Provence · Registration 55726
Certificate expires
Water Damage Restoration · Fire & Smoke Restoration · Applied Microbial Remediation · Odor Control · Trauma & Crime Scene
View technician verification (PDF) — opens in a new tabInsurance is subject to policy terms, conditions and exclusions.
 Facebook
 Instagram
 LinkedIn
 X / Twitter
 YouTube