Water Damage Restoration Toronto - Restoration Group

Emergency? 24-Hrs

416.800.0000
  • Home
  • Emergency Services
    • Emergency Plumbers 24/7
    • Water Damage Restoration
    • Flooded Basement Cleanup
    • Mold Remediation Toronto
    • Sewer Backup Remediation
    • Fire & Smoke Restoration
    • Odour Removal Toronto
    • Biohazard Scene Cleanup
    • Emergency Roofing Repair
    • Water Leak and Detection
    • Condominium Restoration
    • Basement WaterProofing
    • Property Inspection Toronto
    • Sanitizing and Disinfection
    • Insurance Claim Appraisers
    • Equipment for Rent Toronto
    • Privacy Policy & Service Terms
  • Commercial Restoration
  • Blog
  • Our Team
  • Contact
19 February 2025 - Categories: Drying Floating Floors Water Damage Water Removal

Drying Floating Floors


Disaster Restoration Emergency Plumbing Service Blog Icon
Drying Floating Floors, Laminate Floating Floors, Dry Laminate Flooring With Water, Laminate Floors How To Remove, Laminate Floors How To Clean

Drying Floating Floors


Effective Methods for Drying Floating Floors: Step-by-Step Guide

Floating floors, such as laminate and engineered hardwood, are popular for their easy installation and attractive appearance. However, water damage to floating flooring can quickly become a serious issue, leading to warping, buckling, or even mold growth if not handled properly. Whether you’re dealing with minor spills or a major flood, knowing how to dry floating floors quickly and thoroughly is essential for protecting your investment and preventing costly repairs.

Surface Water Removal: The First Step to Save Your Floating Floors

How to Dry Floating Floors After Water Damage:
As soon as you notice water on your floating floors, act fast to minimize damage:

  • Use a Wet-Dry Vacuum: Extract as much standing water as possible. Wet-dry vacuums are highly effective for both small and large areas.

  • Absorb with Towels or Mops: For smaller spills, use absorbent towels or microfiber mops. Removing surface moisture promptly prevents it from seeping beneath the planks, where it can cause hidden problems.

Enhance Air Circulation to Accelerate Drying

Proper air circulation is vital when restoring laminate flooring after a flood or leak:

  • Position High-Powered Fans: Direct fans to blow air across the floor, which helps speed up evaporation.

  • Run Dehumidifiers Continuously: Lowering the humidity in the room is essential for thorough drying. Keep dehumidifiers operating for at least 24 hours, especially in humid climates.

  • Supplement with Heaters: In cool environments, space heaters can raise the room temperature, which increases the evaporation rate and helps to dry floating floors faster.

Disassemble Flooring for Deep Water Removal

Water Under Floating Floors: What to Do?
If water has penetrated under your floating floor, more intensive steps are needed:

  • Remove Baseboards and Molding: Gently take off baseboards to access flooring edges.

  • Lift Flooring Panels: Carefully remove affected planks or tiles, starting from the perimeter. Exposing the subfloor allows moisture to evaporate and reduces the risk of mold growth beneath the surface.

  • Continue Airflow and Dehumidification: Keep fans and dehumidifiers running until all materials are completely dry before reinstalling flooring.

Professional Restoration: When to Call the Experts

Sometimes, DIY drying methods aren’t enough—especially after severe flooding:

  • Specialized Drying Equipment: Restoration professionals use tools like pressure drying systems to extract moisture trapped in subfloors and hard-to-reach areas.

  • Thorough Inspection and Mold Prevention: Pros can assess water damage, check for hidden moisture, and apply treatments to prevent mold on floating floors.

Preventing Water Damage to Floating Floors: Maintenance Tips

To keep your floating floors looking their best and prevent future issues, follow these water damage prevention strategies:

  • Immediate Spill Cleanup: Address spills as soon as they happen to avoid seepage.

  • Monitor Indoor Humidity: Maintain relative humidity between 30% and 50%. Use air conditioners or dehumidifiers to control moisture.

  • Regular Inspections: Frequently check for signs of leaks, water stains, or dampness around appliances, bathrooms, and basements.

  • Use Protective Mats and Rugs: Place water-absorbent mats in high-risk areas, such as kitchens, laundry rooms, and entrances.

  • Consider Waterproof Floating Floor Options: If water is a recurring problem, look for waterproof laminate or vinyl plank flooring for added protection.

Frequently Asked Questions About Drying Floating Floors

Q: How long does it take to dry floating floors after water damage?
A: The drying time depends on the amount of water, room ventilation, and weather conditions. Using fans and dehumidifiers can speed up the process, but full drying may take anywhere from 24 hours to several days.

Q: Can mold grow under floating floors?
A: Yes, if moisture is not fully removed, mold can develop beneath the flooring, causing health risks and structural damage.

Q: Is it possible to save laminate flooring after a flood?
A: Quick action gives the best chance for restoration, but if planks are severely warped or swollen, replacement may be necessary.


By following these effective methods for drying floating floors and prioritizing waterproof floating floor maintenance, you can restore your floors after water damage and prevent future problems. For severe cases, don’t hesitate to seek professional restoration services to ensure your home remains safe, healthy, and beautiful.


For expert water damage restoration and emergency flood services, contact GTA Restoration today for a free assessment and fast, reliable help!


Drying Floating Floors Emergency?

Call Today!

1-800-506-6048

Learn more ↴

Disaster Restoration Photos, Emergency Restoration Services in Toronto: Your Complete Guide, Protection Guide, GTA Restoration Expands Services to All Florida, GTA Restoration,

Share this... Spread the word!
Contents Show
1 Effective Methods for Drying Floating Floors: Step-by-Step Guide
1.1 Surface Water Removal: The First Step to Save Your Floating Floors
1.2 Enhance Air Circulation to Accelerate Drying
1.3 Disassemble Flooring for Deep Water Removal
1.4 Professional Restoration: When to Call the Experts
1.5 Preventing Water Damage to Floating Floors: Maintenance Tips
1.6 Frequently Asked Questions About Drying Floating Floors
1.7 Drying Floating Floors Emergency?
1.7.1 Call Today!
1.8 1-800-506-6048
1.8.1 Learn more ↴


Tags: dry laminate flooring with water, Drying Floating Floors, laminate floating floors, laminate floors how to clean, laminate floors how to remove, Water Damage, Water Removal,

☛ ☛ Relaterd Restoration Articles You May Also Like!

GTA Restoration Referral Program
The Environmental Impact of Restoration Services
5 Water Damage Restoration Tips
Prepare your roof for fall and winter

Emergency? Immediate response 24/7

416.800.0000 416.800.0000

For non-emergencies use our contact form

🚨 Why Drying Floating Floors Must Be a Priority After Water Damage

When water invades your home, Drying Floating Floors immediately becomes a critical task. Unlike traditional flooring, floating floors (laminate, engineered wood, or luxury vinyl planks) are susceptible to hidden moisture beneath the surface. Ignoring this can lead to mold growth, structural weakening, and costly restoration.

🧰 Step-by-Step Process for Drying Floating Floors Efficiently

Drying Floating Floors isn’t just about wiping the surface. Below are the crucial steps professionals follow:

  1. Stop the Source – Whether it’s a leak or flood, halt the water flow immediately.

  2. Remove Surface Water – Use a wet vacuum or absorbent towels to soak up visible water.

  3. Lift the Floating Floor Panels – These must often be removed to access the underlayment.

  4. Inspect the Subfloor – Moisture sensors help determine water penetration levels.

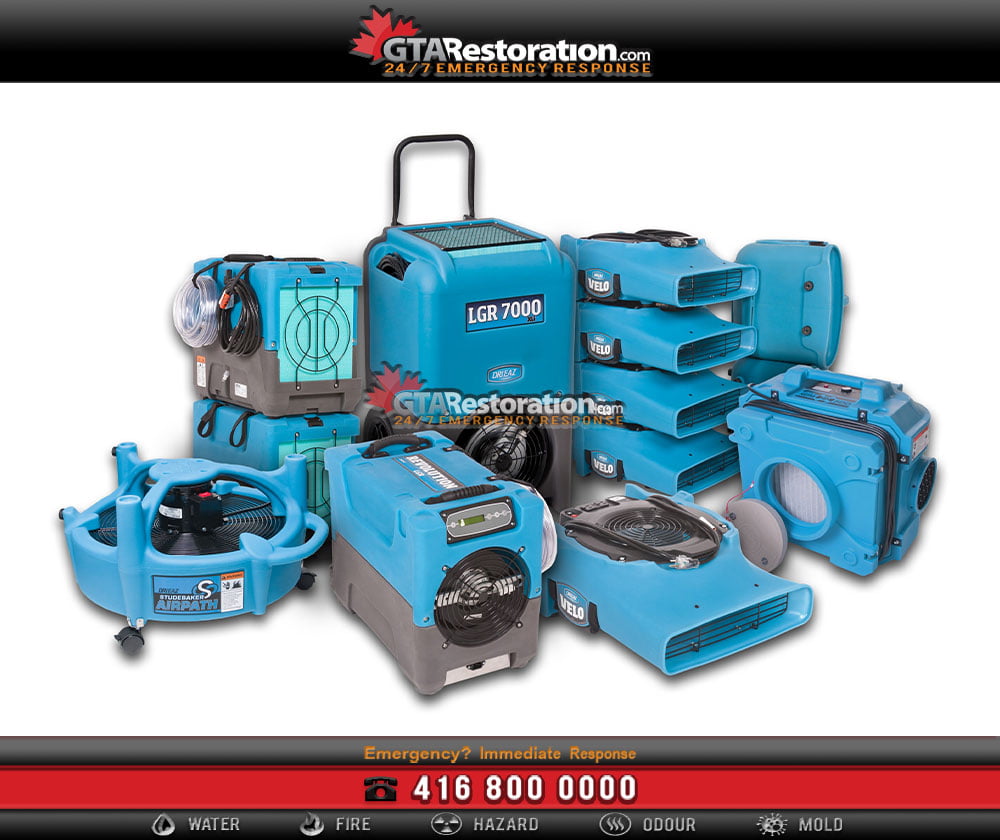
  5. Use High-Velocity Air Movers – These expedite drying floating floors by increasing evaporation.

  6. Deploy Commercial Dehumidifiers – This step is essential for removing moisture from the air and preventing mold.

  7. Utilize Moisture Meters – Re-check affected areas to ensure dryness before reinstallation.

Each of these techniques plays a role in ensuring your drying floating floors process is thorough, effective, and safe.

🌿 Eco-Friendly Solutions for Drying Floating Floors

Sustainability matters—even in restoration. When drying floating floors, opting for environmentally responsible methods ensures you’re not just saving your home, but the planet:

  • Use energy-efficient drying fans.

  • Avoid harsh chemical mold treatments.

  • Employ recyclable moisture barriers during reinstallation.

Homeowners increasingly demand green solutions, and drying floating floors with eco-friendly products can be both effective and sustainable.

📉 Consequences of Incomplete Drying

Incomplete drying of floating floors can result in severe issues:

  • Mold Growth – Often unseen until it causes health symptoms.

  • Subfloor Rot – Reduces property value and requires costly repairs.

  • Structural Instability – Floors may shift, creak, or warp over time.

That’s why a meticulous approach to drying floating floors is essential.

🧠 Expert Insight: The Science Behind Drying Floating Floors

Floating floors aren’t glued down—they’re designed to “float” above underlayment. This design, while convenient for installation, creates air pockets where water can get trapped. The combination of humidity, warmth, and darkness makes for the perfect mold incubator. Thus, drying floating floors requires penetrating these layers fully—not just surface drying.

💡 Common Myths About Drying Floating Floors

Myth 1: “Just open the windows, it’ll dry on its own.”
Truth: Natural air circulation isn’t powerful enough for proper drying of floating floors.

Myth 2: “If it looks dry, it is dry.”
Truth: Water may still be trapped beneath or within the underlayment.

Myth 3: “It’s cheaper to wait than call professionals.”
Truth: Delayed drying of floating floors can lead to thousands in damage.

📋 Checklist: When to Call the Pros

Consider hiring a restoration service for drying floating floors if:

  • You detect a musty smell 24+ hours after the water incident.

  • Warping or buckling is visible.

  • You lack equipment like air movers or moisture meters.

  • The spill involves contaminated water (e.g., sewage backup).


🚿 Final Steps and Long-Term Protection After Drying Floating Floors

Once your drying floating floors process is complete, it’s time to think ahead. How do you ensure this never happens again? Prevention is just as critical as the restoration itself.

🧽 Clean-Up and Sanitization

Before reinstalling your floating floors:

  • Disinfect the Subfloor: Use a safe antimicrobial solution.

  • Inspect for Mold: Even after drying floating floors, mold spores may remain.

  • Replace Damaged Underlayment: Never reuse damp or warped material.

This last step reinforces the importance of a holistic drying floating floors strategy—not just removal, but renewal.

🛡️ Waterproofing Your Future

Homeowners who experience water damage once are likely to face it again. Take these precautions post drying floating floors:

  • Install moisture sensors beneath floorboards.

  • Apply water-resistant coatings or membranes.

  • Redirect water flow with gutter extensions and exterior grading.

Investing in preventive systems today can save you thousands tomorrow on emergency drying floating floors procedures.

🔍 Maintenance Tips to Keep Your Floating Floors Dry

Prevention doesn’t stop after repairs. Routine maintenance is vital:

  • Check for leaks under sinks and appliances monthly.

  • Clean up spills immediately—no delay.

  • Never use excessive water when mopping.

Floating floors are resilient, but their weakest link is water. Regular checks help avoid needing to revisit drying floating floors again and again.

📈 Cost Breakdown: Professional vs. DIY

A professional drying floating floors service can range from $300 to $2,000 depending on:

  • Square footage

  • Water category (clean vs. blackwater)

  • Time passed before action was taken

DIY methods might seem cheaper, but the hidden cost of incomplete drying (mold remediation, floor replacement) can far exceed initial savings.


Nationwide, Local Pricing

Restoration Group offers local flood & water damage repair, mold removal/remediation, asbestos removal/abatement, fire/smoke damage repair services and much more.

Search

  • Ajax Asbestos Removal
  • Ajax Mold Removal
  • Ajax Water Damage
  • Anjou Mold Removal
  • Aurora Mold Removal
  • Aurora Water Damage
  • Beaconsfield Asbestos Removal
  • Beaconsfield Mold Removal
  • Boucherville Mold Removal
  • Brampton Asbestos Removal
  • Brampton Asbestos Removal
  • Brampton Mold Removal
  • Brampton Water Damage
  • Brossard Mold Removal
  • Burlington Asbestos Removal
  • Burlington Mold Removal
  • Burlington Water Damage
  • Burnaby Mold Removal
  • Burst Frozen Pipe Edmonton
  • Caledon Mold Removal
  • Caledon Water Damage
  • Calgary Asbestos Removal
  • Calgary Mold Removal
  • Calgary Water Damage
  • Cambridge Mold Removal
  • Cambridge Water Damage
  • Chambly Mold Removal
  • Chateauguay Mold Removal
  • Chomedey Mold Removal
  • Clarington Mold Removal
  • Concord Mold Removal
  • Concord Water Damage
  • Mississauga Mold Removal
  • Coquitlam Mold Removal
  • Cumberland Mold Removal
  • Dollard-des-Ormeaux Mold Removal
  • Dorval Mold Removal
  • Edmonton Asbestos Removal
  • Edmonton Mold Removal
  • Edmonton Water Damage
  • Etobicoke Asbestos Removal
  • Etobicoke Mold Removal
  • Etobicoke Water Damage
  • McMurray Fire Damage Services
  • Saskatchewan Asbestos Removal
  • Saskatchewan Mold Removal
  • Frozen Burst Pipe Repair Montreal
  • Frozen Burst Pipe Repair Ottawa
  • Gloucester Asbestos Removal
  • Gloucester Mold Removal
  • Hamilton Asbestos Removal
  • Hamilton Asbestos Testing
  • Hamilton Mold Removal
  • Hamilton Water Damage
  • Hampstead Mold Removal
  • Hampstead Water & Flood Damage
  • L'île-Bizard Mold Removal
  • Kahnawake Mold Removal
  • Kanata Asbestos Removal
  • Kanata Mold Removal
  • Kanata Water Damage
  • Kirkland Mold Removal
  • Kitchener Asbestos Removal
  • Kitchener Mold Removal
  • Kitchener Water Damage
  • Lasalle Mold Removal
  • Laval Asbestos Removal
  • Laval Mold Removal
  • Laval Water Damage
  • London Mold Removal
  • London Water Damage
  • Longueuil Mold Removal
  • Longueuil Water Damage
  • Markham Asbestos Removal
  • Markham Mold Removal
  • Markham Water Damage
  • Mississauga Asbestos Testing
  • Mississauga Mold Removal
  • Mississauga Water Damage
  • Montreal Air Duct Cleaning
  • Montreal Asbestos Removal
  • Montreal Asbestos Testing
  • Montreal East Mold Removal
  • Montreal Mold Removal
  • Montreal Water Damage
  • Mount-Royal Mold Removal
  • Nepean Asbestos Removal
  • Nepean Mold Removal
  • Nepean Water Damage
  • New Market Water Damage
  • New Westminster Mold Removal
  • Newmarket Mold Removal
  • North York Mold Removal
  • Oakville Mold Removal
  • Oakville Water Damage
  • Orleans Asbestos Removal
  • Orleans Mold Removal
  • Orleans Water Damage
  • Osgoode Mold Removal
  • Oshawa Mold Removal
  • Oshawa Water Damage
  • Ottawa Air Duct Cleaning
  • Ottawa Asbestos Removal
  • Ottawa Mold Removal
  • Ottawa Vermiculite Removal
  • Ottawa Water Damage
  • Pickering Mold Removal
  • Pickering Water Damage
  • Red Deer Mold Removal
  • Red Deer Water Damage
  • Richmond Hill Mold Removal
  • Richmond Hill Water Damage
  • Richmond Mold Removal
  • Rideau Lakes Mold Removal
  • Rockcliffe Park Mold Removal
  • Roxboro Mold Removal
  • Saint Laurent Mold Removal
  • Saint-Hubert Mold Removal
  • Scarborough Asbestos Removal
  • Scarborough Mold removal
  • Scarborough Water Damage
  • Sewer Backup Edmonton
  • Sewer Backup Montreal
  • Sewer Backup Ottawa
  • Sherwood Park Asbestos Removal
  • Sherwood Park Mold Removal
  • Spruce Grove Asbestos Removal
  • Spruce Grove Mold Removal
  • St. Albert Asbestos Removal
  • St. Albert Mold Removal
  • Ste.Dorothee Mold Removal
  • Surrey Mold Removal
  • Thornhill Mold Removal
  • Toronto & GTA Asbestos Removal
  • Toronto & GTA Mold Removal
  • Toronto Air Duct Cleaning
  • Toronto Water Damage
  • Unionville Mold Removal
  • Unionville Water Damage
  • Vancouver Asbestos Removal
  • Vancouver Mold Removal
  • Vancouver Water Damage
  • Vanier Mold Removal
  • Vaughan Mold Removal
  • Vaughan Water Damage
  • Westmount Mold Removal
  • Whitby Water Damage
  • Woodbridge Asbestos Removal
  • Woodbridge Mold Removal
  • Woodbridge Water Damage
  • Waterproofing
  • Kitchen & Bath Pro
  • Condo Restoration

We Work Direct with All Insurance Companies

Wᴇ ᴀʀᴇ ᴄᴏᴍᴍɪᴛᴛᴇᴅ ᴏɴ ᴡᴏʀᴋɪɴɢ ᴡɪᴛʜ ᴇᴠᴇʀʏ ɪɴsᴜʀᴀɴᴄᴇ ᴄᴏᴍᴘᴀɴʏ ᴀᴄʀᴏss Cᴀɴᴀᴅᴀ & USA.


In House Financing Available

In House Financing Available

FREE Financing Up To 24 Months NO INTEREST NO MONEY DOWN


Contact Us


Learn more ↴ Restoration Tips


RELATED ARTICLES

  • How To Avoid Sprinkler Water Damage?
  • How To Deal With Floods & Water Damage?
  • Signs of Mould Growth In Your Property?
  • Avoid Mould Damage from Melting Snow
  • How to Prevent Water Damage In Summer
  • Avoid Mold Growth With Proper Air Flow
  • Prevent House Floods from Spring Rains
  • Prevent Frozen Burst Pipes in Winter
  • What To Do on Your Flooded Basement?


Drying Floating Floors Tips

👨‍🔧 Choosing the Right Contractor

When hiring experts for drying floating floors, look for:

  • IICRC certification

  • Same-day response time

  • Positive reviews with documented results

  • Clear quotes with no hidden fees

Avoid vague promises. The right team will explain their process and back it with a moisture audit report post-job.

💬 Customer Testimonials: Success After Proper Drying

“We thought we could handle it ourselves, but the mold smell lingered. After calling a pro team for drying floating floors, the difference was night and day. No smell, no warping—like it never happened.”
— Rebecca T., Mississauga

“Fast, friendly, and thorough. They not only dried our floating floors, but also helped us waterproof the basement to prevent future issues.”
— James L., Toronto

Real stories underscore how crucial correct drying floating floors techniques are.

✅ Summary: Your Dry Floor Recovery Checklist

Here’s your final 7-step checklist for foolproof drying floating floors:

  1. Remove surface water immediately.

  2. Inspect thoroughly using meters.

  3. Lift floorboards to access the subfloor.

  4. Use professional air movers and dehumidifiers.

  5. Clean, disinfect, and replace underlayment as needed.

  6. Recheck moisture levels before reinstalling.

  7. Install preventative waterproofing solutions.


Final Thoughts: Don’t Gamble—Act Fast on Drying Floating Floors

Water damage waits for no one. The longer you delay drying floating floors, the more extensive the damage becomes. Use the expert tips and proactive prevention strategies above to keep your floors dry, durable, and mold-free.

Your home deserves the best protection. Make Drying Floating Floors a top priority today.


Our Clients


Our Vendor Clients


Affiliates


fully certified


Restoration Group Toronto

Copyright © 2009 - All Rights Reserved. Sitemap/Links

LinkedInInstagram Twitter Facebook YouTube

Call Us 1.800.506.6048

Emergency? Immediate response 24/7

416.800.0000

416.800.0000

We cover all GTA 24/7.

Head Office:
101 Lebovic Ave,
#10
Toronto, ON
M1L 0J2,
Open 24 hours

Downtown Office:
250 Yonge St,
#10
Toronto, ON
M5B 2L7,
Open 24 hours

For non-emergencies use our contact form


    Not sure what you need?

    Call us today to find the best product for your situation.

    416-800-0000 416-800-0000

    Head Office:
    101 Lebovic Ave,
    Unit #10
    Scarborough,
    ON, M1L 4T7
    Hours
    24-Hours Open

    Downtown Office:
    250 Yonge Street,
    Unit #1A
    Toronto,
    ON, M5B 2L7
    Hours
    24-Hours Open

    Drying Floating Floors

    Get a quote today