...

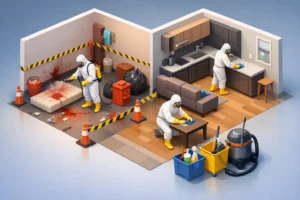
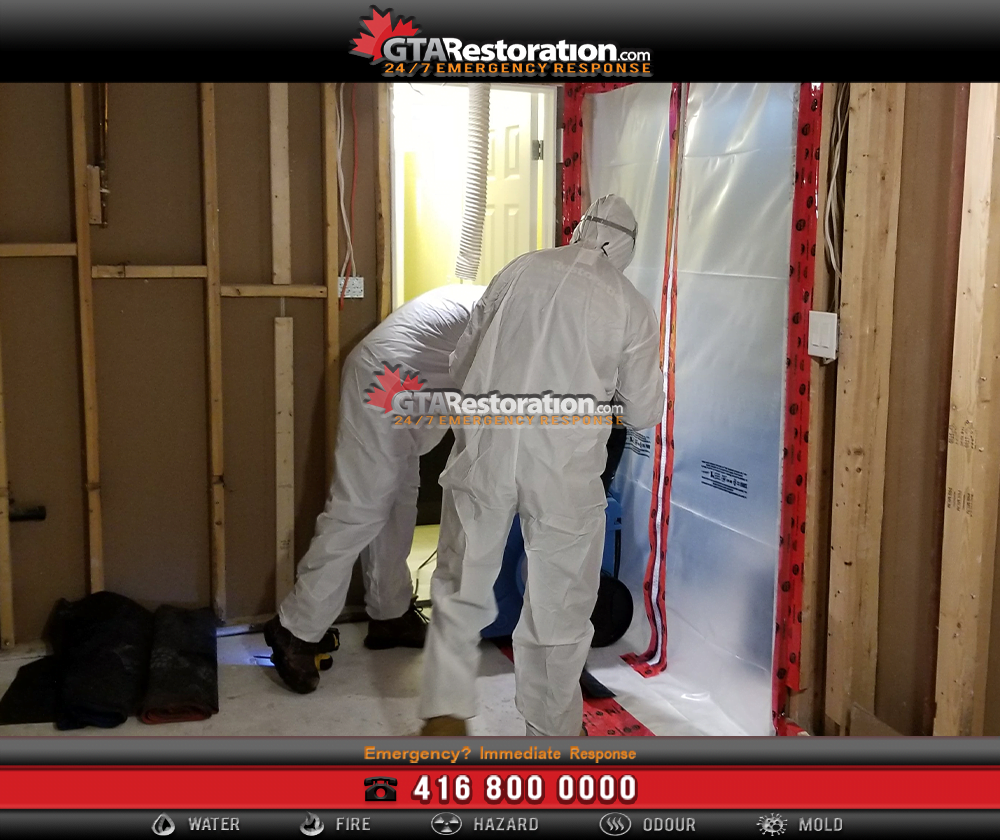
Workers in protective coveralls beside a plastic doorway barrier, illustrating the biohazard cleanup process.


Understanding the Biohazard Cleanup Process

The biohazard cleanup process starts with a site check and a plan to reduce risk. The team removes waste, cleans the area and uses the right products to disinfect it. The work depends on what happened and how far fluids or waste have spread.

GTA Restoration helps people in Toronto and the GTA arrange biohazard cleanup and repairs. Some incidents are deeply personal. Therefore, clear updates, privacy and respect for your belongings matter from start to finish.

Call Us: 416-800-0000

When Biohazard Remediation May Be Needed

Blood, body fluids, sewage and discarded needles can create risks that go beyond ordinary dirt. For example, fluids may reach carpet backing, floor joints or wall cavities. However, a quick wipe may leave soiled material out of sight.

The plan must fit the site. For example, a hospital or lab may have its own work rules. For related property services, see our trauma and crime-scene service information.

Before the Cleanup Team Arrives

First, keep people and pets out of the affected area. Also, avoid touching waste, moving soiled items or walking through fluids. Do not pick up needles by hand or reach into bags that may contain sharps.

If someone needs urgent medical help, call emergency services first. If police or other authorities control the scene, wait until they release it for cleanup. Meanwhile, share known risks with the team from a safe place.

10 Stages of the Biohazard Cleanup Process

These stages explain the biohazard cleanup process from start to finish. Some tasks overlap. Also, the plan may change as hidden damage comes to light. For trauma scenes, the IICRC’s S540 standard overview covers site checks, work plans, waste handling and checks after cleaning.

1. Assess the Biohazard Remediation Needs

First, the team checks the source, affected area and how people could be exposed. It also looks for sharps, damaged surfaces and risks to nearby rooms. These checks help the crew choose how to do the work.

2. Choose Protective Equipment and Work Methods

Before handling soiled items, workers choose protective equipment suited to the task. This may include gloves, eye protection, coveralls and a respirator where needed. Workers must know how to wear and remove this gear. However, gear alone cannot remove every risk.

3. Isolate the Biohazard Cleanup Area

Next, the team controls entry and keeps the work area apart from clean spaces. The plan may call for barriers, signs and a waste removal route. These steps help limit the spread on shoes, tools and equipment.

4. Remove Affected Materials

The biohazard cleanup process includes removing fluids, waste and items that cannot be safely cleaned. For example, soiled carpet or underlay may need removal. However, the team should review what can be saved and what must go before throwing things away.

Workers contain waste as they remove it. Sharps need puncture-resistant containers, so they should never go loose into ordinary waste bags.

5. Clean Surfaces Before Disinfection

Cleaning removes dirt and residue so the next treatment can work as intended. Therefore, the team uses methods suited to each surface and avoids carrying soil into clean areas. Tools used in the work also need to be cleaned.

The CCOHS guide explains the role of product choice, training and clear work steps.

6. Disinfect During Biohazard Remediation

Next, workers use a disinfectant made for the surface and intended use. They follow the label for the right strength and contact time. Where required, the surface must stay wet for that time. Therefore, a quick spray and wipe may not meet the label directions.

Also, workers must follow the safety directions on the label. Mixing cleaning chemicals can create new risks. Even after this step, a room is not sterile.

7. Arrange the Correct Waste Disposal

The team must check the waste type and arrange suitable packaging, storage, transport and disposal. Rules depend on the waste and where the job takes place. Therefore, not all cleanup waste can go to the same place.

For regulated biomedical waste, Ontario’s biomedical waste guidance explains key handling practices. Our guide to waste types and handling concerns provides related background.

8. Review the Biohazard Cleanup Results

Before repairs begin, the team checks that it has completed the agreed work. This may include visual checks, work records and moisture readings where items became wet. More checks or tests depend on the site and what needs to be measured.

A clean smell alone cannot confirm the result. Instead, ask what was checked, what the findings mean and whether any work remains.

9. Repair and Restore Damaged Areas

Once cleanup checks are complete and the area is dry enough, repairs can follow. These may include new flooring, drywall or other finishes. Also, fix any ongoing source, such as a failed drain, before closing the area. Our sewage recovery service covers related incidents.

10. Provide Records and Clear Next Steps

Finally, the biohazard cleanup process should end with a clear account of the work completed. Ask for the agreed records, any required waste documents and guidance on when to use the room. Then, discuss repairs and any follow-up visits.

Support should continue through this stage. Families and site managers should also have a named contact for questions about belongings, dates and the next steps.


Need Help Planning Biohazard Remediation?

Call GTA Restoration to discuss the site, access needs and appropriate cleanup support.

Call Us: 416-800-0000

Learn More

Trauma and Crime-Scene Services | Waste Types and Handling | Sewage Recovery Services
Share this... Spread the word!


Plan Your Biohazard Cleanup Process

A clear call helps the team plan. Start with the location and known hazards, then explain any limits on access.

1. Confirm Permission to Enter

If authorities control the scene, wait for release. Then, arrange approved access with the owner or property manager.

2. Share Essential Details

Explain what happened from a safe place. Also, mention fluids, sharps or affected rooms without entering to inspect them.

3. Discuss Specialist Cleanup Experience

Ask about training and past work. Also, check the team’s insurance and work plan for this site.

4. Review the Work Scope

Ask what tasks the work includes. Then, discuss access limits, likely costs and scheduling before work starts.

5. Identify Important Belongings

Tell the team about items you hope to keep. However, saving them depends on whether they can be cleaned.

6. Confirm Biohazard Remediation Records

Ask what checks and records the team will provide. Also, clarify any tests or waste records included in the scope.

7. Plan Remaining Repairs

Some surfaces may need replacement after cleanup. Therefore, confirm who will complete those repairs and when the area can be used.

8. Keep One Contact

Finally, choose a contact for updates and questions. This helps protect privacy and keeps plans for the property clear.


Need help arranging sensitive cleanup?
Call GTA Restoration to discuss the situation and next steps.

Call Us: 416-800-0000


GTA Service Centre


Biohazard Cleanup Process FAQs

What happens before cleanup starts?

First, the team confirms access and assesses the site. Then, it plans protection, work methods and waste handling.

Is cleaning the same as disinfection?

No. Cleaning removes soil and residues. Disinfection then uses a suitable product according to its label directions.

Can every affected item be saved?

No. Fluids may soak into soft materials. Therefore, each item needs assessment before cleaning or disposal.

Does every job need laboratory testing?

No. Testing depends on the site and work scope. Ask what it would measure and how results would guide decisions.

When can people use the room again?

Follow the team's access instructions. Confirm that required checks and any work needed before re-entry are complete.


Learn more ↴


Direct Billing & Insurance Claims

Ask your insurer about coverage, deductibles and the records it needs.


Payment options

In-House Financing Available

Financing up to 24 months. No interest. No money down. Ask us about the terms.


Certifications & Insurance

View our firm certification, technician qualifications and insurance documents.

IICRC Certified Firm

GTA Restoration Inc.

Firm number 199912
Valid through

View IICRC certificate (PDF) — opens in a new tab

Business Insurance

GTA Restoration Group Inc.

$5 million general liability per occurrence
$8 million contractors pollution per claim
–

View insurance certificate (PDF) — opens in a new tab

IICRC Technician Qualifications

Tony Sokol T. Lleshi · Registration 214520
Valid through

Water Damage Restoration · Fire & Smoke Damage Restoration · Applied Microbial Remediation · Odor Control · Trauma & Crime Scene

View technician verification (PDF) — opens in a new tab

Insurance is subject to policy terms, conditions and exclusions.


Emergency? Click to Call!